
Sweet Science Saturday: Why Chocolate Seizes, The One Drop of Water That Ruins a Batch
Late September is when many chocolate makers begin moving from experimentation into Q4 holiday production. That makes a seized batch more than an irritating texture problem. When a 20-pound batch turns into a stiff, grainy paste, the cost includes ingredients, labor, machine time, packaging schedules, and lost production capacity.
The frustrating part is how little moisture it takes. A wet spatula, condensation from a lid, rinse water left inside a melanger gasket, or steam from an open water bath can change melted chocolate in seconds.
The good news is that seizing is not mysterious. It is a predictable particle-level event, and once you understand the mechanism, prevention and rescue become much more practical.
Beta Test Program: Get free, unlimited access to the full Cocoa Craft software suite in exchange for monthly feedback. Join the beta at cocoa-craft.com!
If you are testing a new recipe this season, start recording it in the Recipe Builder and Chocolate Lab. Log the formulation, moisture exposure, equipment condition, and outcome while the details are still fresh.
What actually happens when chocolate seizes?
Melted chocolate is a concentrated suspension. Sugar and cocoa particles are dispersed through liquid cocoa butter, which acts as the continuous phase and lubricates the solid particles.
When the system is dry and properly refined, the particles remain separated enough to flow. When a small amount of water enters, the balance changes immediately.
Sugar is hygroscopic. That means it attracts and absorbs moisture. The water does not spread evenly through the whole batch at first. Instead, it lands in a small area and dissolves the surface of nearby sugar particles.
That partially dissolved sugar becomes a thick syrup. The syrup behaves like glue:
- Sugar particles adhere to nearby cocoa particles.
- Cocoa particles begin sticking to one another.
- The wet area expands as more sugar dissolves.
- Fresh particle surfaces become exposed and available for contact.
- Cocoa butter is pushed out of the spaces that previously allowed particles to slide.
This is why a single drop can have an effect much larger than its volume suggests. The moisture creates a broad, sticky interface between particles. Instead of many small solids separated by fat, the chocolate develops clusters and a dense network of solid-to-solid contact.
The result is the familiar sudden change from fluid chocolate to a dull, stiff, grainy paste.
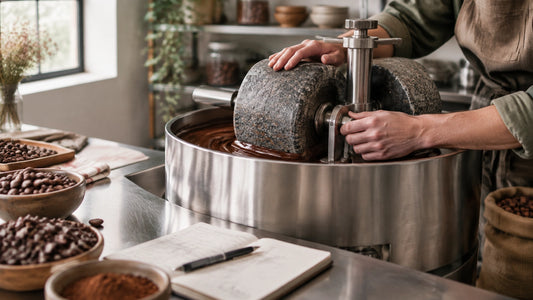
Why the viscosity spikes so dramatically
Chocolate is not a simple liquid. It behaves more like a yield-stress fluid: a certain amount of force is needed to make it start moving, and its flow changes as the stress increases.
Chocolate rheology is often described using the Casson model. In practical terms, two things matter:
- Yield stress: how much force it takes to get the chocolate moving.
- Plastic viscosity: how much resistance remains once it is moving.
Seizing raises both.
The glued particle network increases the force needed to start flow. Once movement begins, the particles grind and drag against each other instead of sliding through a continuous film of cocoa butter. The suspension becomes crowded, poorly lubricated, and mechanically interlocked.
That is the Casson effect you feel at the bowl: the batch may move slightly under heavy pressure, but it no longer pours, levels, or behaves like usable couverture.
At a glance: identify the defect before choosing a fix
| Cause | Typical appearance and feel | Best response |
|---|---|---|
| Water seizing | Sudden stiffening, grainy paste, often immediately after contact with moisture | Convert deliberately into sauce, ganache, or a baking base |
| Overheating | Thickening with a scorched, bitter, flat, or smoky flavor; possible fat separation | Cool and evaluate flavor; discard if burned |
| Sugar bloom | Pale, rough surface caused by moisture dissolving and recrystallizing sugar | Usually a surface defect; remelt only if the chocolate still tastes sound |
| Fat bloom | Gray or white streaks, dusty surface, generally not a stiff paste | Texture may remain workable; tempering and storage conditions need review |
Seizing from water is not the same as overheating or bloom. Bloom is usually a surface or crystallization problem. Overheated chocolate may become thick, but the flavor and aroma often tell you that heat damage has occurred. Seized chocolate is primarily a moisture-driven dispersion failure.
Prevention: control moisture at every contact point
The core rule is simple:
Keep chocolate completely dry, or add enough warm liquid to create a deliberate emulsion.
The dangerous middle ground is a small amount of free moisture, too little to make ganache, but enough to create localized syrup and particle clumping.
Use genuinely dry utensils
Bowls, spatulas, whisks, molds, thermometers, and scrapers must be fully dry. A surface can look dry while still carrying a thin film of water.
Air-dry washed equipment before bringing it near melted chocolate. Pay particular attention to seams, handles, tool joints, and the underside of lids. Wooden tools are especially difficult to verify because they can retain moisture internally.
Keep steam and condensation away
An open bowl over a water bath is a common source of trouble. Steam rises around the bowl, condenses on a cooler rim or lid, and eventually drips into the chocolate.
If you use a water bath, keep the water below the bowl and avoid a simmer that generates unnecessary steam. Do not cover hot chocolate with a cold lid. For production work, indirect dry heat is often easier to control.
Inspect the stone grinder or melanger after washing
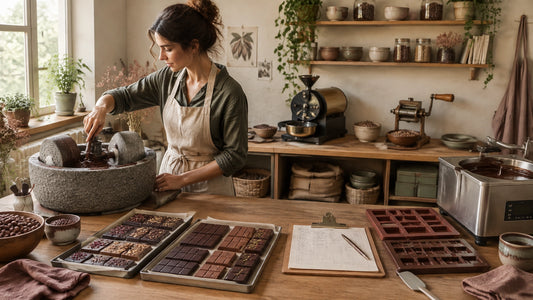
A stone grinder for chocolate can appear clean while still holding rinse water around the drum, scrapers, shaft seals, or gaskets. Before adding chocolate, check those areas deliberately.
Run a clean, dry towel around the drum and gasket channels. If the machine was washed shortly before use, allow enough time for hidden moisture to evaporate. This small inspection belongs in the same category as checking scale calibration or confirming the roast profile.
Manage humidity
Sugar attracts moisture from the air, and high humidity increases the risk of surface condensation, sugar bloom, and handling problems. Keep chocolate covered when it is not being processed, but make sure the cover itself is dry and not carrying condensation.
If your room is humid, avoid moving cold ingredients or equipment directly into a warm production area. Give containers time to acclimate before opening them.
Add liquid as a planned emulsion
If a recipe includes cream, water, coffee, fruit purée, or liqueur, do not add a few drops to melted chocolate and hope it will incorporate. Warm the liquid and add enough to move the formulation decisively into a ganache or sauce structure.
The correct amount depends on the chocolate percentage and the intended texture. A small addition below the recipe’s moisture threshold is risky; a properly measured liquid phase is much more stable.
Lecithin can help reduce interparticle friction and improve flow when it is used correctly in a formulation. It is not a substitute for dry equipment, and it will not neutralize a drop of free water. Treat it as a formulation tool, not a rescue button.
Check the current Cocoa Craft shop for available chocolate, nibs, drinking chocolate, and chocolate making equipment as you plan your seasonal trials.
How to rescue seized chocolate
First, stop and assess the batch. Do not immediately add more fat or continue heating. Check whether the chocolate smells and tastes clean.
If there is no burned flavor, you usually have three practical options.
1. Turn it into sauce or ganache
The most reliable rescue is to change the goal. Add hot water, cream, or another appropriate warm liquid in measured increments while stirring vigorously.
For a small test portion, begin with a teaspoon of near-boiling water. Mix thoroughly before adding more. As the liquid amount increases, the sugar dissolves more completely and the mixture transitions from a fat-continuous chocolate suspension into a water-continuous sauce or ganache.
This rescued mixture will not return to temperable, snappy chocolate. It can still be excellent in:
- Ganache fillings
- Dessert sauces
- Drinking chocolate
- Brownie batter
- Cake batter
- Ice cream or frozen dessert bases
For a large batch, test the method on a small sample first. Scaling a rescue without knowing the final water requirement can create a second problem: a sauce that is too thin for its intended use.
2. Use it in a baking application
A seized batch can go into a cake or brownie formula when the flavor is sound, the texture will be diluted by the batter, and the recipe can absorb the added fat and moisture.
This is a good option for chocolate that is grainy but not scorched. Record the amount used and adjust the liquid or fat in the baking formula if necessary.
3. Use fat only for limited loosening
Cocoa butter may loosen a mildly thickened mass, and lecithin may help improve flow in a controlled formulation. However, adding oil or cocoa butter does not reliably restore the original structure after water has caused major agglomeration.
Do not count on this approach for a finished coating or tempered bar. If the texture remains gritty after a small controlled test, change the product destination rather than spending more time trying to reverse the event.
Throw the batch away when it has a scorched or rancid flavor, has been contaminated, or cannot be made safe and usable for another application. A rescue is worthwhile when it preserves quality, not when it hides a defect that will reach a customer.
Make the failed batch useful
A failed batch should produce information, not just waste. Record:
- Chocolate type and percentage, such as a 60 dark chocolate formulation
- Batch size
- Room temperature and humidity
- Heating method and temperatures
- Every utensil and vessel used
- Whether a lid, water bath, or rinse process was involved
- Condition of the melanger drum and gaskets
- Time and location where thickening began
- Rescue method and final use
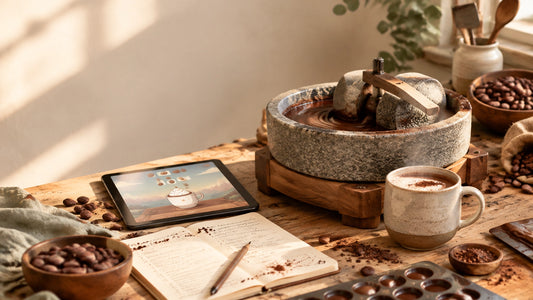
Use the Recipe Builder and Chocolate Lab to save moisture tolerance, process notes, tasting observations, and corrective actions. Version history makes it easier to determine whether a failure came from the recipe, the environment, the equipment, or the operator workflow.
That is how chocolate craft becomes repeatable. The goal is not to eliminate every mistake; it is to make each mistake diagnosable.
After you save the batch notes, take a short break with the Cocoa Craft Arcade, then return to the formulation with a clear next test. Better records and better habits are part of building “The operating system for chocolate production”, built by chocolate makers, for chocolate makers.
The Q4 prevention checklist
Before starting a holiday batch, confirm:
- All utensils and containers are completely dry.
- No condensation is forming on lids or ingredient containers.
- The water bath is not producing steam near the chocolate.
- The stone grinder or melanger drum, seals, and gaskets are free of rinse water.
- The room is reasonably dry and temperature-stable.
- Any liquid ingredient is measured, warmed, and added as part of a planned emulsion.
- The batch plan includes a place to record process conditions and unexpected changes.
- A small rescue test is performed before changing an entire production batch.
Create a free Cocoa Craft account and save your next batch plan in the Chocolate Lab. Record the moisture controls before the grinder starts, attach notes after the batch, and turn a preventable failure into usable production knowledge.
Author: Cocoa Craft