
Sweet Science Saturday: Seeding vs. Tabling – Which Tempering Method Matches Your Chocolate Vibe?
Written by Cocoa Craft
Ever wondered why some homemade chocolate looks glossy and snaps perfectly, while other batches turn out dull and crumbly? The secret isn't luck, it's tempering. And here's the exciting part: once you understand the basics, you can absolutely nail it at home.
Welcome to Sweet Science Saturday! Today, we're breaking down two classic tempering methods, seeding and tabling, so you can figure out which one matches your chocolate-making style. Whether you're a curious home hobbyist or a startup maker ready to level up, there's a method here with your name on it.
Ready to discover your chocolate vibe? Yes! Let's dive in.
Why Does Tempering Even Matter?
Before we get into the methods, let's talk about why tempering is such a big deal.
Chocolate contains cocoa butter, and cocoa butter can crystallize in six different forms. Only one of those forms, Form V, if you want to get nerdy about it, gives you that beautiful shiny surface, satisfying snap, and smooth melt-in-your-mouth texture we all crave.
Without proper tempering, your chocolate might:
- Look streaky or "bloomed" (those white patches aren't mold, they're unstable fat crystals)
- Feel soft or crumbly instead of snappy
- Melt too quickly in your hands
Tempering is basically the art of coaxing your melted chocolate into forming those perfect crystals. Think of it as giving your chocolate a gentle pep talk. And there are two main ways to do it.
Method One: The Seeding Technique
The seeding method is like inviting a well-behaved friend to your party who sets the tone for everyone else. You're essentially adding small pieces of already-tempered chocolate to your melted batch, and those pieces "seed" the proper crystal structure throughout.
How It Works
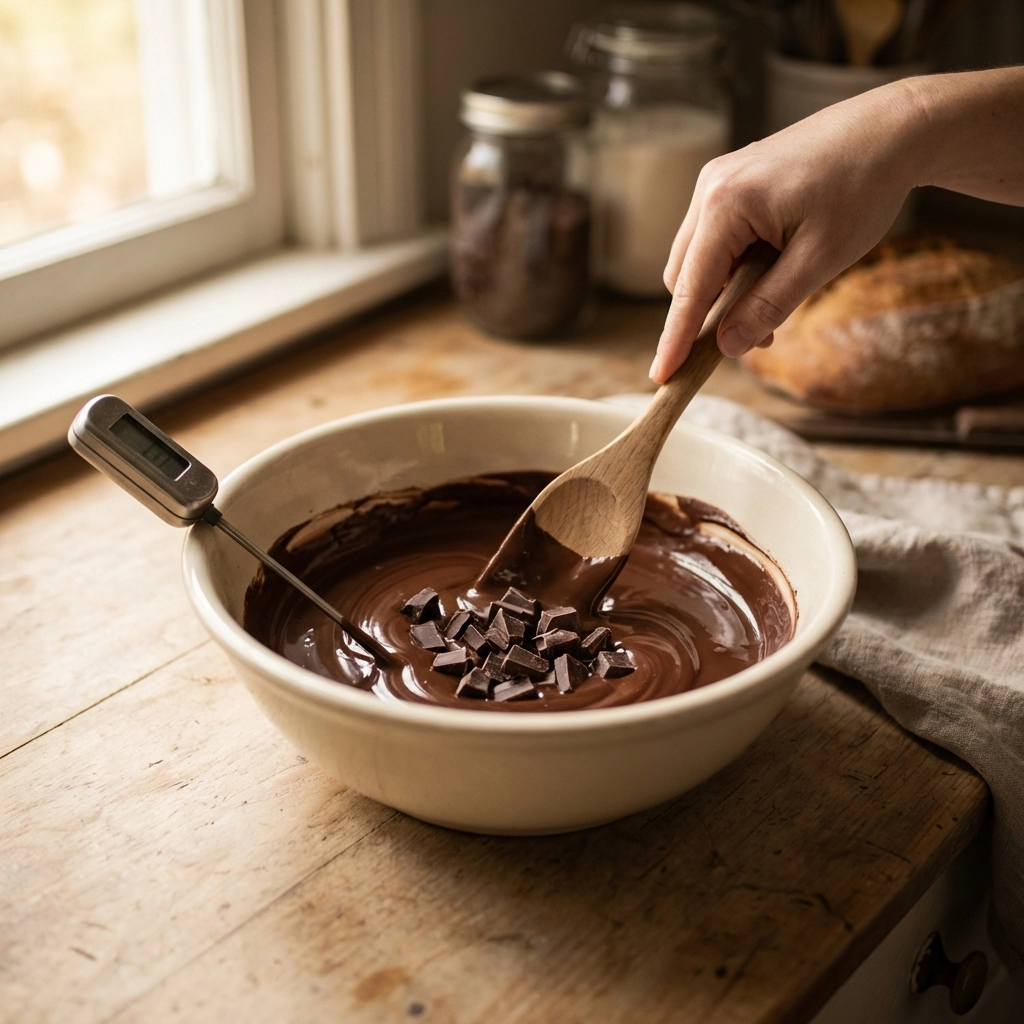
- Melt your chocolate to about 45-50°C (113-122°F) for dark chocolate
- Add finely chopped tempered chocolate (about 25-30% of your batch weight)
- Stir continuously until everything melts and the temperature drops to working range
- Check the temperature, you're aiming for around 31-32°C (88-90°F) for dark chocolate
That's it! The pre-tempered pieces act as a crystal template, encouraging all that melted chocolate to follow their lead.
Why Home Makers Love Seeding
- Minimal equipment needed, just a bowl, spatula, and thermometer
- Clean and contained, no chocolate splashing across your counter
- Beginner-friendly, easier to control and less intimidating
- Space-efficient, perfect if your kitchen is cozy (we're being polite here)
The Trade-Offs
- You need properly tempered chocolate to start with (good quality bars work great)
- Requires patience while stirring and monitoring temperature
- Can take a bit longer than tabling once you're experienced
For most home hobbyists and makers just starting their chocolate journey, seeding is the practical, approachable choice. It's clean, it's forgiving, and anyone can try it with stuff they probably already have in their kitchen.
Method Two: The Tabling Technique
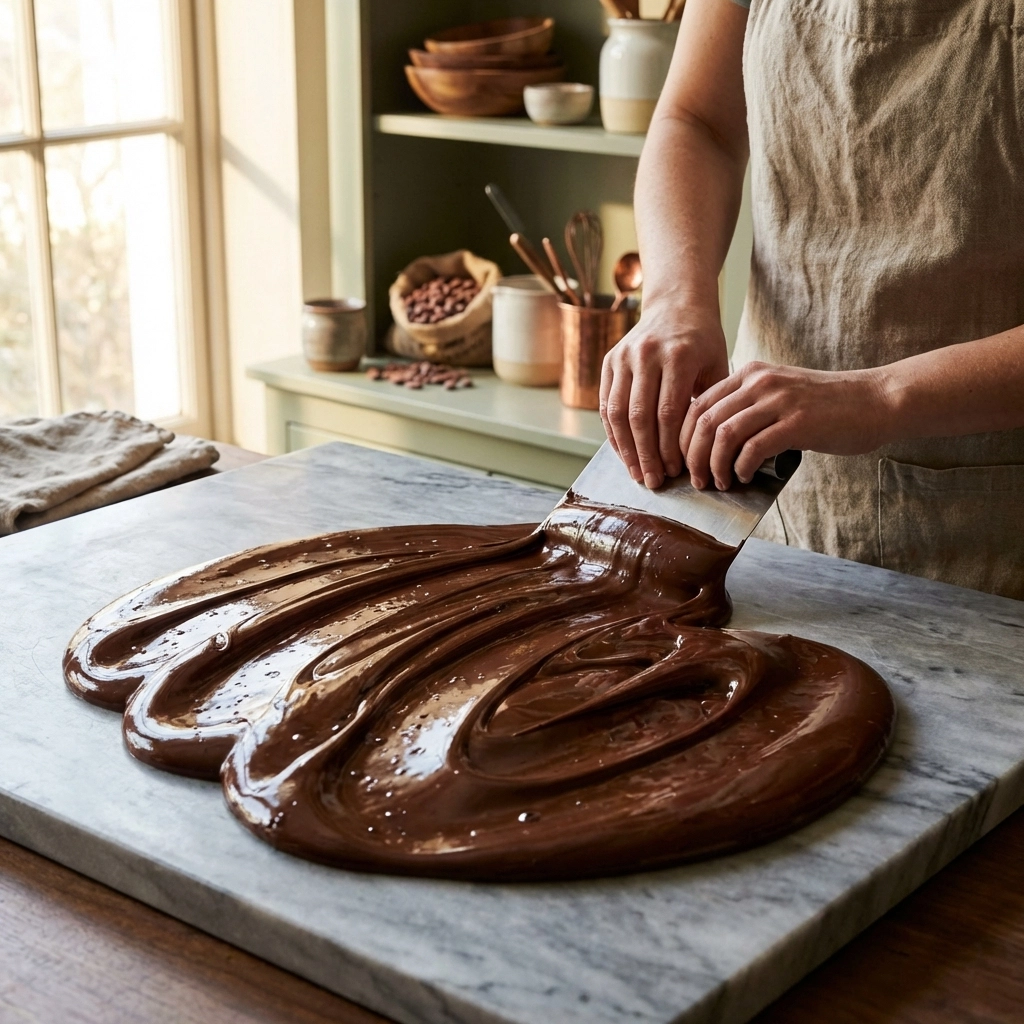
Now let's talk about tabling, the method that makes you feel like a true chocolate artisan. This is the one you've probably seen in videos: a chocolatier gracefully spreading molten chocolate across a marble slab, working it back and forth with scrapers until it's perfectly tempered.
How It Works
- Melt your chocolate completely (same starting temperature as seeding)
- Pour about two-thirds onto a cool marble, granite, or similar surface
- Work the chocolate by spreading it out and gathering it back repeatedly
- Feel the texture change as it thickens and cools
- Return it to the bowl with the remaining warm chocolate and stir to combine
- Check temperature and adjust as needed
The constant motion on the cool surface encourages rapid, even crystal formation. It's tactile, it's hands-on, and honestly? It's pretty magical to watch.
Why Pros Gravitate Toward Tabling
- Faster with practice, experienced chocolatiers can temper quickly this way
- Superior crystal development, the hands-on manipulation creates excellent results
- Mimics industrial processes, similar principles to professional tempering machines
- Educational, you really feel the chocolate transform, which builds intuition
The Trade-Offs
- Requires specific equipment, marble or granite surface, bench scrapers, offset spatulas
- Can get messy, chocolate goes everywhere until you develop technique
- Steeper learning curve, takes practice to master the timing and movements
- Needs space, not ideal for tiny kitchens
Tabling is the preferred method among artisanal small-batch producers and professional chocolatiers who've put in the practice hours. If you love the craft aspect of chocolate-making and want that hands-on connection with your ingredients, this method is incredibly rewarding.
Head-to-Head: Which Method Fits Your Style?
Let's break this down simply. Here's a quick comparison to help you find your match:
| Your Situation | Best Fit | Why |
|---|---|---|
| Home cook, limited space | Seeding | Cleaner, minimal equipment |
| Just starting out | Seeding | More forgiving, less overwhelming |
| Time-sensitive projects | Seeding | More predictable timing |
| Experienced maker wanting control | Tabling | Faster with practice, tactile feedback |
| Learning chocolate fundamentals | Tabling | Builds hands-on understanding |
| Small-batch artisan production | Tabling | Professional-level results |
Here's the honest truth: neither method is "better." They're just different tools for different situations. Many chocolate makers actually use both, depending on what they're making and how much time they have.
Getting Started: What You'll Need
For Seeding
- Quality chocolate bars (these will be your "seed" chocolate)
- Heat-safe bowl
- Spatula
- Digital thermometer
- A bit of patience
For Tabling
- Marble, granite, or smooth stone surface (cool to the touch)
- Bench scraper and offset spatula
- Digital thermometer
- Heat-safe bowl
- Cleaning supplies (trust us)
Not sure where to find the right tools? We've curated starter kits in our shop specifically for newcomers, everything bundled together so you can focus on the fun part: making chocolate.

Your First Tempering Experiment
Ready to try it yourself? Here's a simple challenge for this weekend:
- Pick your method based on what equipment you have
- Start small, 200g of chocolate is plenty for practice
- Use our Recipe Builder for step-by-step tempering guidance
- Don't stress about perfection, even "failed" tempered chocolate tastes delicious
The beautiful thing about chocolate? Every batch teaches you something. Your first attempt might not be glossy-magazine-perfect, and that's completely okay. The process itself is the reward.
Take Your Tempering Further
Feeling inspired? We've got you covered.
When you sign up for the Chocolate Lab, you'll unlock:
- Detailed tempering tutorials for both methods, with video walkthroughs
- Recipe tracking so you can log what works (and what needs tweaking)
- First access to equipment bundles curated for different skill levels
- Community tips from makers who've been exactly where you are
Already have an account? Log in here to access your workspace and dive deeper.
The Sweet Science Continues
Tempering is one of those skills that seems intimidating until you actually try it. Yes, there's science involved. Yes, there's technique to develop. But honestly? It's also just really fun to play with melted chocolate and watch it transform.
Whether you're a seeding fan who loves the clean simplicity or a tabling enthusiast who craves that artisan experience, the most important thing is that you're making chocolate your way.
So grab your thermometer, pick your method, and let's see what you create. We'll be here every Sweet Science Saturday with more chocolate knowledge, more tips, and more reasons to fall deeper in love with this craft.
Create your free Chocolate Lab account today and access everything you need to master tempering: from beginner tutorials to pro-level techniques. Your glossiest, snappiest chocolate is waiting.
Happy tempering! 🍫