
Maker Spotlight: The Weekend Maker Who Turned One Dark Milk Recipe Into a Small Chocolate Brand
Monday Maker Spotlight · Author: Cocoa Craft
Nina Alvarez did not set out to build a chocolate brand.
At first, she wanted one reliable dark milk chocolate recipe for Saturday experiments. Something with enough cocoa character to satisfy serious chocolate people, enough sweetness to share with friends, and a texture that did not make anyone reach for a glass of water.
Her first batch tasted excellent.
Her second batch tasted like it had taken a different career path.
The third was flavorful but gritty. The fourth was smooth but flat. By the sixth, Nina had a notebook full of arrows, question marks, roast times, and one note that simply read: “Why is this happening?”
That was the beginning of her small bean-to-bar chocolate brand, not a dramatic leap, but a slow shift from making chocolate when inspiration struck to building a process she could repeat.
Before we get into Nina’s system, create your free Cocoa Craft login. The Chocolate Lab, Recipe Builder, and Formulation Tool are designed to help you capture each experiment while the details are still fresh. Your future self will appreciate it. Your old spreadsheet named “final recipe NEW 3” will not.
One recipe, five variables, and a great deal of patience
Nina’s target was a 60% dark milk chocolate: creamy, lightly sweet, and unmistakably cocoa-forward.
The percentage gave her a useful starting point. Searches for “60 dark chocolate” or “60 cocoa chocolate” often lead makers toward a style that sits between conventional milk chocolate and a more intense dark bar. But the number alone does not create the flavor. Roast development, milk powder, sugar, cocoa butter, refining time, and tempering all influence the final result.
Her initial 1,000-gram working formula was:
- 500 grams roasted cacao nibs
- 100 grams cocoa butter
- 70 grams whole milk powder
- 326 grams sugar
- 4 grams lecithin
That formula put the batch at 60% cocoa components while keeping the texture and sweetness approachable. Nina treated it as a baseline, not a finished product.
This distinction mattered. A recipe is not a brand simply because it tastes good once. A brand needs a product that can be made again, described clearly, packaged consistently, and produced without turning every batch into a small domestic mystery.
The weekend schedule that made the difference
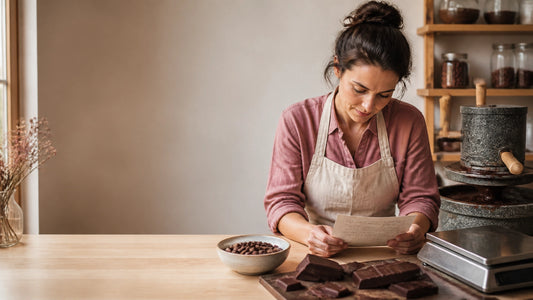
Nina had a full-time job during the week, so she built her chocolate production around a realistic weekend rhythm.
Friday evening: plan the batch.
She checked ingredient weights, cleaned the equipment, reviewed the previous batch notes, and decided which single variable would change.
Saturday morning: roast and prepare.
She roasted the beans, cooled them fully, cracked them, and winnowed away the husk. Rather than calculating from the original bean weight, she weighed the finished nibs after winnowing. This kept the formulation honest.
Saturday afternoon: refine.
The nibs, cocoa butter, sugar, and milk powder went into her melanger in stages. The machine ran for many hours, often continuing overnight.
Sunday morning: taste and adjust.
Nina evaluated texture, aroma, acidity, bitterness, and viscosity. If the chocolate needed another few hours of refining, she recorded that decision rather than treating it as a failure.
Sunday afternoon: temper and mold.
She melted, cooled, and rewarmed the chocolate before filling molds. The bars rested while Nina cleaned up, labeled the batch, and tried not to stare at them as if they might reveal their secrets.
This schedule did more than fit her life. It separated production stages clearly enough that she could identify where a batch changed.
That is a major step in chocolate craft. You do not need a factory to work systematically. You do need a system that survives a busy weekend.
Roasting for the chocolate you want to make
Nina’s early roast profiles were based on time and temperature alone. That is common, especially when a maker is still learning how different origins respond to heat.
She eventually began roasting toward a flavor goal.
For her dark milk chocolate recipe, she tested moderate profiles that preserved some fruit and acidity while developing enough toast and cocoa depth to stand up to milk powder. She recorded:
- Bean origin and lot
- Starting weight
- Roast temperature
- Roast duration
- Cooling time
- Aroma during and after roasting
- Bean color
- Winnowing yield
Changing one variable at a time gave her usable information. A slightly longer roast might increase caramel notes, but it could also reduce the brightness she wanted. A hotter roast might add depth while pushing the finished chocolate toward bitterness.
There was no single “correct” profile. There was only the profile that supported the chocolate she was trying to make.
For home chocolate making, this is a useful mindset: stop asking whether a roast is good in isolation. Ask whether it is right for the formula, the origin, and the flavor target.
Why the stone grinder became part of the recipe
Nina initially thought of her melanger, or stone grinder for chocolate, as a texture machine. Run it long enough and the grit should disappear.
That is only part of the story.
Refining affects particle size, but extended grinding also changes how the chocolate tastes and flows. Acidity can soften. Aromas can integrate. Viscosity can shift. The chocolate may become smoother, but too much refining can also make it heavy or pasty.
Nina began tasting at regular intervals:
- Early stage: sharp acidity and obvious grain
- Middle stage: softer aroma and improved cocoa integration
- Later stage: smoother texture and rounder flavor
- Extended stage: possible loss of freshness or excessive viscosity
She did not chase an abstract idea of maximum smoothness. She aimed for a texture that felt clean and fluid on the tongue.
The stone grinder also taught her to add ingredients with intention. Cocoa butter went in first to help establish flow. Nibs followed gradually. Sugar and milk powder were added in stages instead of being dumped into a struggling mass. Lecithin was reserved for later in the process, once Nina had a better sense of the chocolate’s natural viscosity.
The machine was not just equipment. It was part of the formulation.
Explore the Cocoa Craft shop for chocolate making equipment, stone grinders, cocoa bean roasters, tempering machines, molds, bean-to-bar kits, cocoa nibs, and other tools for building a practical setup.
The spreadsheet stopped being funny
For a while, Nina kept notes in a paper notebook, phone photos, and a spreadsheet with an increasingly theatrical file name.
Then she moved the work into Cocoa Craft.
Using the Chocolate Lab and digital formulation tools, she recorded ingredient percentages, batch weights, roast details, refining time, process notes, tasting observations, and recipe versions in one place.
The change was not glamorous. It was useful.
Nina could compare the batch that tasted rich and balanced with the batch that tasted dry. The difference was usually not one spectacular mistake. It was a collection of small details:
- The roast ran four minutes longer.
- Winnowing loss changed the actual nib weight.
- Sugar was added too quickly.
- The melanger stopped several hours early.
- The chocolate entered tempering at the wrong temperature.
- The room was warmer and more humid than usual.
The software did not replace her palate. It gave her palate a memory.
That is where many craft chocolate makers find leverage. Sensory judgment tells you what happened. Structured records help you determine why.
Tempering turned a good recipe into a sellable bar
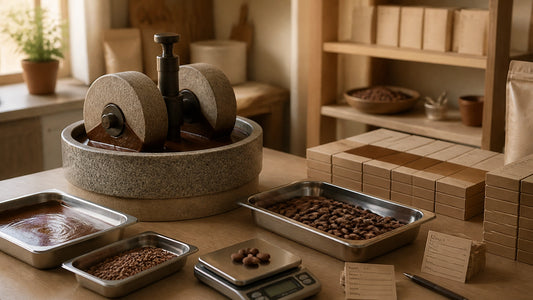
Nina’s formula became reliable before her tempering did.
Some batches had a dull surface. Others had a soft snap or released poorly from the mold. The flavor was there, but the presentation was not ready for customers.
She started recording tempering as its own production stage:
- Melt the chocolate completely.
- Cool it while stirring and seeding.
- Rewarm it to a workable temperature.
- Mold the bars.
- Record gloss, snap, release, and cooling conditions.
Her working temperatures became a starting reference, not a rigid rule. Milk chocolate can respond differently depending on the formula, equipment, room conditions, and quantity being tempered. Nina learned to trust the process while still checking the result.
She also stopped treating tempering as something to rush through at the end of a long day. A batch that has taken twelve hours to refine deserves more than a distracted pour into molds.
From signature bar to small brand
After several documented iterations, Nina had a dependable base:
- 60% cocoa components
- Roasted cacao nibs
- Cocoa butter
- Whole milk powder
- Cane sugar
- Vanilla
- A mild roast profile
- A consistent refining window
- A recorded tempering process
The original recipe had not changed dramatically. Nina had.
She could make the bar again. She could explain what made it distinctive. She could identify which process step needed attention when the flavor drifted. Most importantly, she had a reference point for future products.
Her first variation added roasted cocoa nibs for a crisp contrast against the creamy base. She kept that version separate from the original formula and recorded it as a deliberate variation rather than an improvised topping.
The result was not a huge product line. It was a small, understandable family of chocolates built around one trusted recipe.
That is often the smarter path for a weekend maker. Start with one product that earns repeat orders. Then expand when the process, records, packaging, and production time can support it.
Nina’s five rules for making chocolate on the side
1. Pick one target flavor.
Decide whether the batch should emphasize fruit, roast, creaminess, bitterness, or cocoa intensity.
2. Change one variable at a time.
If the roast, sugar, milk powder, and refining time all change together, the next batch will teach you very little.
3. Weigh after winnowing.
Your formula depends on usable nibs, not the bean weight you started with.
4. Record process, not only ingredients.
Roast, grind, refine, temper, mold, room conditions, and tasting notes all belong in the batch history.
5. Keep the good version.
A successful recipe should be easy to find, understand, reproduce, and improve.
Between batches, Nina also made room for a proper reset. She tasted a bar, checked out cocoa nibs or drinking chocolate from the shop, or spent five minutes in the Cocoa Craft Arcade playing Hot Cocoa Tapper.
A short game will not temper your chocolate for you. It can, however, keep you from making a rushed formulation decision after staring at a melanger all afternoon.
Build your own repeatable chocolate practice
Nina’s story is not really about discovering a magical dark milk chocolate recipe. It is about turning a promising recipe into working knowledge.
That is the difference between a delicious experiment and a small chocolate brand.
Cocoa Craft is built for that transition: early recipe development, formulation records, tasting notes, equipment planning, and production workflows that help makers carry knowledge from one batch to the next. Built by chocolate makers, for chocolate makers, Cocoa Craft is working toward The operating system for chocolate production.
Create your login at cocoa-craft.com and start recording your next batch in Chocolate Lab, Recipe Builder, and the Formulation Tool.
Get free, unlimited access to the full Cocoa Craft software suite in exchange for monthly feedback. Join the beta at cocoa-craft.com!
Then visit the Cocoa Craft shop for 60% Dark Milk Chocolate, 60% Dark Milk Chocolate with Cocoa Nibs, cocoa nibs, drinking chocolate, single-origin bars, bean-to-bar kits, chocolate melangers, roasters, tempering machines, molds, and other equipment collections.
When the grinder starts humming, let the recipe be only the beginning. Record what happens next.
For more practical maker stories, visit the Cocoa Craft blog.